2nd pair of socks from sock series for easier access.
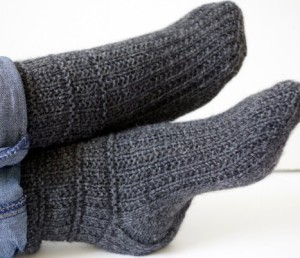
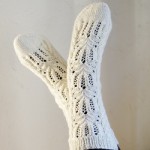
This pair is perfect for both genders. Pattern is simple yet interesting and it holds the sock nicely around the foot.
My kid, who loves comfortable things, said that these were the most comfortable socks she has ever had.
Enough said…
Make a swatch:
Cast on 26 stitches and knit fist 2 rows;
- 1st row: knit;
- 2nd row: knit 3, purl to last 3 sts and knit last 3;
- Repeat rows 1 and 2 about 12 times;
- Knit last 2 rows and cast off;
Calculate your stitches:
Step 1: You’ve finished your swatch. Now you have to measure how many stitches you have on 5 cm / 2 inches?
Step 2: Measure the circumference of your foot.
Step 3: Make your calculations:
With cm – (circumference of your foot x stitch count on 5 cm) divide by 5;
With inches – (circumference of your foot x stitch count on 2 inches) divide by 2;
Step 4: Take your number from step 3 and divide it by stitch count of pattern repeat (2 stitches).
For example: My number was 50 and the pattern repeat is 2 stitches – so I have to calculate 50/2=25
So, is your number without a comma?
If yes, then you’re good to go – your number from step 3 matches and this is your cast on stitch count.
But if your number is with comma then we need to adjust it a little bit. Take your answer without comma (if my number was 25,5 then I’ll take 25) and add 1 (25+1=26) and multiply it with your pattern repeat number (26 x 2 = 52). This is your cast on stitch count.
Start with your sock:
Cast on number of stitches you just calculated.
Pattern repeat is 2 stitches.
Cuff and leg:
Start with:
- knit 1 round;
- purl 1 round;
- knit 1 round;
Pattern:
Step 1: knit;
Step 2: *knit 1, purl 1* repeat to end;
Step 3: Repeat rounds 1 and 2 in total of 5 times (10 rounds total);
Step 4: knit 2 rounds, purl 1 round, knit 1 round;
Continue this pattern until you’ve reached desired length, ending with step 4;
Heel flap
- Heel flap is worked back and forth over half of your total stitches while the remaining stitches rest on their needles.
- I usually knit my heel flap with 3rd and 4th needle.
- First stitch of every row is a slipped stitch – we need our edges to be loopy, so we can later easily pick up stitches.
- Knit as many rows as many stitches you have on your two needles . For example – I have 28 stitches on two needles, so I need to knit 28 rows total.
Row 1 (wrong side): slip 1 stitch, purl to end.
Row 2 (right side): slip 1, knit 1 across.
Repeat rows 1 and 2.
Turning the heel
Knitted back and forth.
Row 1 (wrong side): Purl across half the steps of your heel flap plus 1, purl 2 together, purl 1. Now TURN the work.
Row 2 (right side): Slip 1, knit 3, ssk, knit 1, TURN.
Row 3: Slip 1, purl 4, purl 2 together, purl 1, TURN.
Row 4: Slip 1, knit 5, ssk, knit 1, TURN.
Row 5: Slip 1, purl 6, purl 2 together, purl 1, TURN.
Row 6: Slip 1, knit 7, ssk, knit 1, TURN.
Continue adding one worked stitch before the decrease in each row, until all of the stitches have been worked, finishing with a right side row (you have now as many stitches as you had on one needle + 2 additional stitches).
Gusset
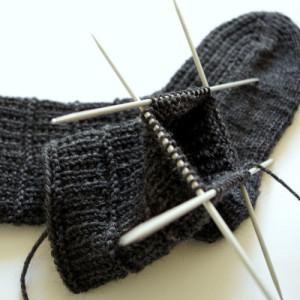
Gusset will be knitted in rounds again. First you have to pick up stitches from one side of the heel flap, then knit stitches from 2nd and 3rd needles following the pattern below, pick up stitches from other side of heel flap and knit last stitches (your needles have switches places – 1st and 4th needle are for sole. 2nd and 3rd needle are for upper part of foot with pattern repeats).
Pattern for 2nd and 3rd needle: Round 1: *knit 1, purl 1* repeat to end. Round 2: knit. Repeat rounds 1 and 2.
Step by step:
- Divide your heel stitches in half, leaving half on the current needle and putting the other half on an empty needle.
- With the right side of the work facing you, take the needle holding the leftmost heel stitches and use it to pick up stitches along the slipped stitched edge of the heel flap, moving upward toward the cuff, one stitch per slipped stitch. You should be picking up amount of stitches you had on one needle when you first started (so you have picked up stitches + stitches from heel flap on this one needle);
- Now knit your 2nd and 3rd needle as you did before heel flap following the pattern repeats;
- You should now be at the other side of the heel flap, with an empty needle in your hand. Pick up the same number of stitches that you did on the other side, then continue across the live stitches that are waiting on the last needle (the ones remaining from the section where you turned the heel). By the way, this is your new beginning of the round now – 1st and 4th needle should have more stitches then 2nd and 3rd needle. Right?
Gusset decreases
You just formed your gusset. Now we need to make decreases, so we can have nicely fitted socks.
Round 1: Knit all around (following pattern on 2nd and 3rd needle), knitting through back loop on the picked-up stitches along both sides of the heel flap only; otherwise knit normally.
Round 2: Knit until 3 stitches remain on Needle 1, knit 2 together, knit 1; knit across Needle 2 and Needle 3 following the pattern; on Needle 4, knit 1, ssk, knit to end.
Round 3: Knit (following pattern on 2nd and 3rd needle).
Repeat rounds 2 and 3 only until all four needles have the same number of stitches on them again.
Foot
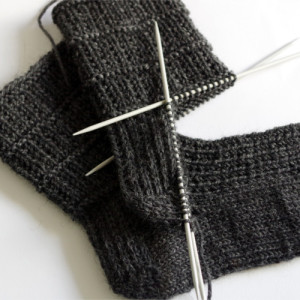
Knit all rounds (following pattern on 2nd and 3rd needle) until you have 2 inches left to knit (or 4,5 cm).
Toe decreases.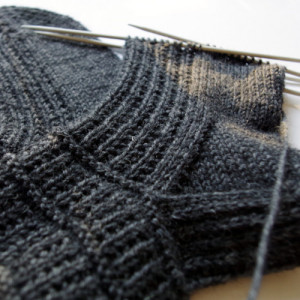
Round 1:
Needle 1 – knit to last 3 stitches, knit 2 together, knit 1;
Needle 2 – knit 1, ssk, knit to end;
Needle 3 – knit to last 3 stitches, knit 2 together, knit 1;
Needle 4 – knit 1, ssk, knit to end.
Round 2: Knit.
Repeat these two rounds until you are down to a little less than a quarter of your original stitch count.
Adjust the remaining stitches onto two needles, so that the foot’s top and bottom rows of stitches are parallel and the yarn is hanging at the end of the needle holding the sole stitches. Knit across a few stitches if you need to. Cut yarn, leaving about a 10 inch to 12 inch tail. Graft the toe together using Kitchener stitch.

What is the needles size? What is the gauge- stitches per inch?
Hi Becky, whatever yarn you want to use along with the needles recommended for that yarn.
Hopefully this is a quick question… when you are decreasing the toe, do you still work the pattern for needle 2 & 3? It looks like that might be the case in the photos? Thanks for your help!
Hi Elisa, yes, you are correct. Continue with the pattern on 2nd and 3rd needle.
I need help calculating the number of stitches to cast on. The formula is not making sense to me.
Sure, Christina. Did you make your swatch? Can you please tell me, if you measure your swatch, how many stitches fit into 5 cm / 2 inches and I’ll help you calculate.
Hola,me gustaría tanto tejer este calcetín pero si hubiera un video se lo agradecería mucho(nunca he tejido calcetines)y este me parece maravilloso,en unos meses tendremos frío.
I can’t seem to figure out my cast on stitches either… I had 17 stitches (rows) in 2 inches or 14 columns in 2 inches. I measured at my husband’s AR of his foot around and it’s 10.5 inches. It seems like with the math I need 90 stitches? That seems like a lot and when I lay my seat on his foot for comparison I need just about 3 swat he’s worth but with the math it would be like 4 swatches worth and would be really loose. I’ve never made socks before. I’m using a sock yarn that is labeled as #1… 50g = 152m. Size 3 needles.
Hey Nichole,
Did you block or stretch out your swatch before measuring? Also, did you make your swatch knitting back and forth or in rounds?
I’ve started a k2 P2 rib for my cuff. I have done 7 rows. Do you think this pattern would look ok with this cuff?
Yes, I think it will look great.