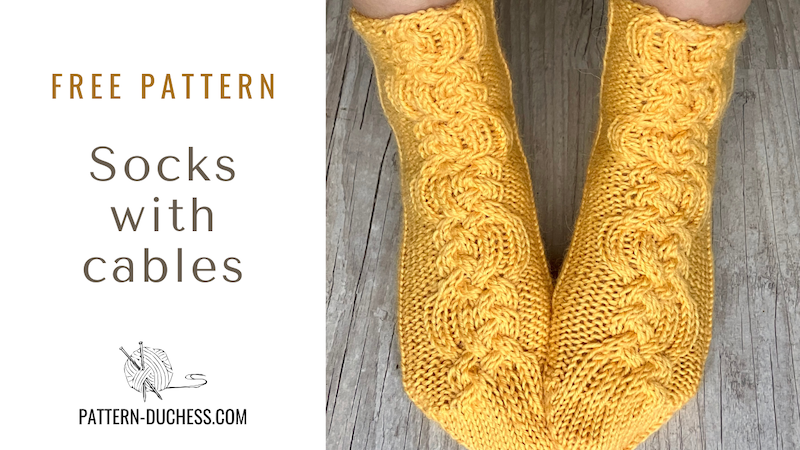
Welcome to Your Free Cabled Sock Knitting Pattern!
Knitting socks is more than just creating something warm and cozy—it’s a journey of learning, patience, and creativity. If you’re a beginner exploring the world of sock knitting, I want you to know one thing: mistakes are part of the process, and they mean you’re learning.
Growing up in Estonia, knitting was a natural part of life. We even learned it in school! I still remember the day our teacher introduced us to sock knitting. I already knew how to knit socks, thanks to my lovely grandmother, but one of my classmates wasn’t as fortunate. She made a mistake in her sock, and the teacher made her unravel everything. I can still see her tears as she frogged her work, and I remember thinking “This is not how I would teach”.
My grandmother had a different approach. When I made mistakes in my first sock, she would smile and say, “You’re learning, and that’s what matters. A first sock without mistakes isn’t a first sock at all.” That lesson stayed with me, and while I never became the teacher I imagined as a child, here I am today—teaching you how to knit socks, with a promise to always encourage, not discourage.
This free cabled sock knitting pattern is designed to inspire confidence, whether it’s your first pair of socks or your fiftieth. With detailed instructions and a unique cable design, you’ll enjoy the process of creating something beautiful, mistakes and all. Every dropped stitch or uneven cable is a stepping stone to mastering this craft.
So grab your needles, pick your favorite yarn, and let’s knit together. And remember: every stitch, even the imperfect ones, brings you closer to a finished pair of cozy socks that are uniquely yours.
Materials:
- Yarn: Match your gauge (18 sts x 26 rows = 10 x 10 cm)
- Needles: Size 4 mm double-pointed needles (DPNs) or circular needles if working in magic loop
- Stitch markers
- Cable needle
Sizes:
- Small (S): Foot circumference 17 cm (6.75″)
- Medium (M): Foot circumference 20 cm (8″)
- Large (L): Foot circumference 23 cm (9″)
Abbreviations:
- CO: cast on;
- K, k: knit;
- P, p: purl;
- 2/2 RC: slip 2 stitches to a cable needle, hold at the back, knit 2 stitches, then knit the 2 stitches from the cable needle;
- 2/2 LC: slip 2 stitches to a cable needle, hold at front, knit 2 stitches, then knit the 2 stitches from the cable needle;
- 2/2 RPC – slip 2 stitches to a cable needle, hold at the back, knit 2 stitches, then purl the 2 stitches from the cable needle;
- 2/2 LPC – slip 2 stitches to a cable needle, hold at front, purl 2 stitches, then knit the 2 stitches from the cable needle;
- 2/1 RPC – slip 1 stitch to a cable needle, hold at the back, knit 2 stitches, then purl the stitch from the cable needle;
- 2/1 LPC – slip 2 stitches to a cable needle, hold at front, purl 1 stitch, then knit the 2 stitches from the cable needle;
- k2tog: knit 2 together (decrease);
- ssk: slip the next two stitches knitwise, one at a time, then knit them together through the back loop (decrease);
- p2tog: purl 2 together (decrease);
- sl1: slip 1 stitch;
- sts: stitches;
- rnd: round.
Gauge:
Before starting, knit a small swatch to check your gauge. Adjust needle size if necessary to match the pattern’s gauge for a proper fit.
- 18 sts x 26 rows = 10 x 10 cm in stockinette stitch.
Instructions
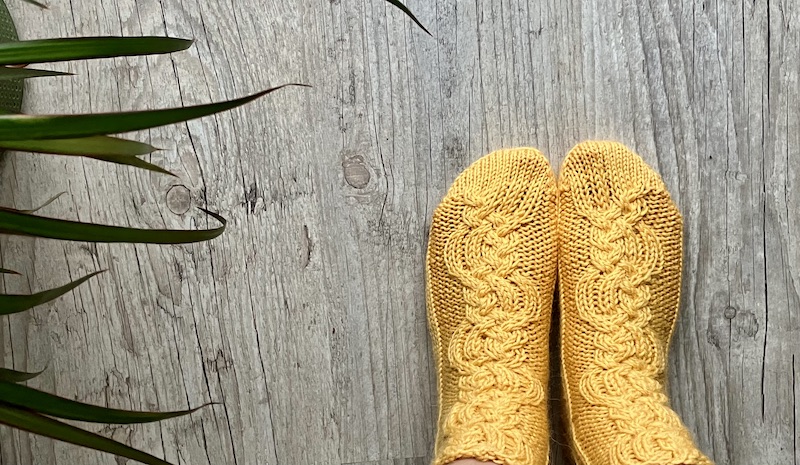
Cuff:
- CO 40 (48, 56) sts for S (M, L). Distribute stitches evenly across 4 needles and join to work in the round.
- Place a stitch marker to mark the beginning of the round and start with the Leg pattern.
- Preparing round – left foot:
Needles 1 & 2: p5(p7; p9), k10, p5(p7; p9).
Needles 3 & 4: (k1, p2, k1) across.
Preparing round – right foot:
Needles 1 & 2: p5(p7; p9), k10, p5(p7; p9).
Needles 3 & 4: (k1, p2, k1) across.
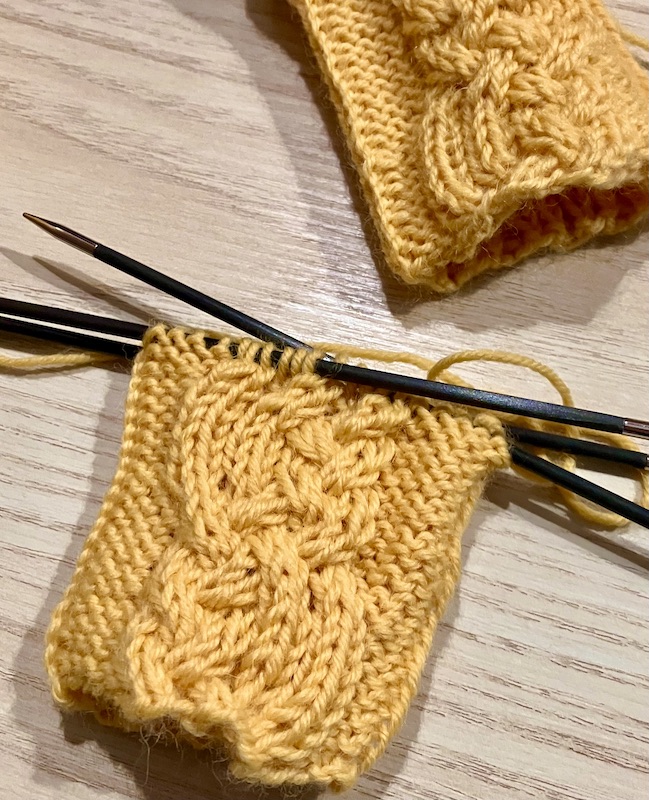
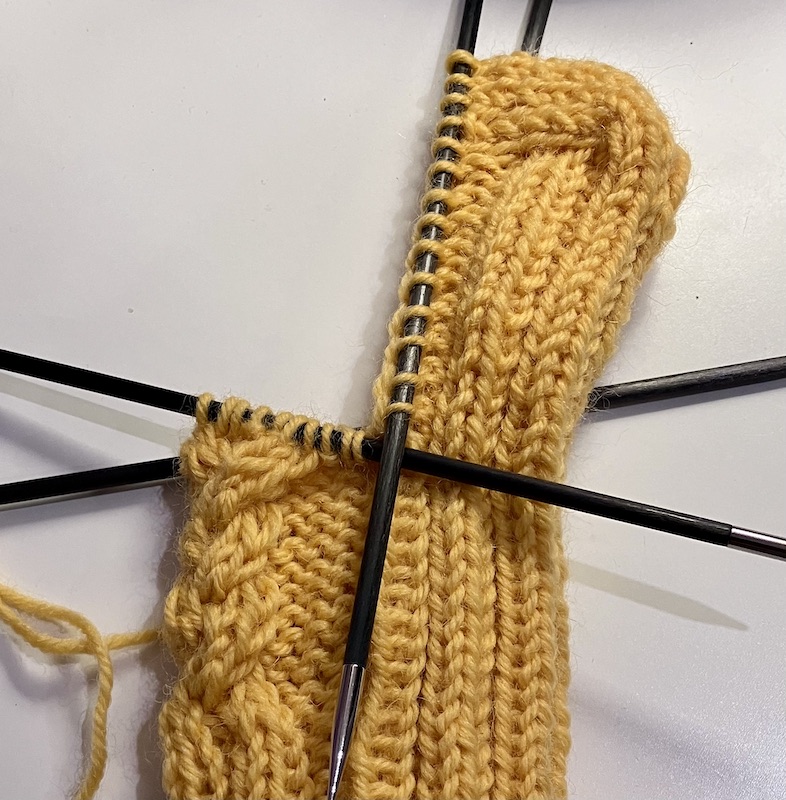
Leg (Cable Pattern):
Start with working on the leg part according to the chart or written instructions following these instructions:
- Follow the pattern below on first two needles (needles 1 and 2);
- I put my stitches from needles 1 & 2 on one needle, so I can easily keep track and move cables.
- (k1, p2, k1) across on the last two needles (needles 3 & 4).
Work this way until you’ve got a desired length or 20 rounds (1 pattern repeat) total. Then start with the heel flap.
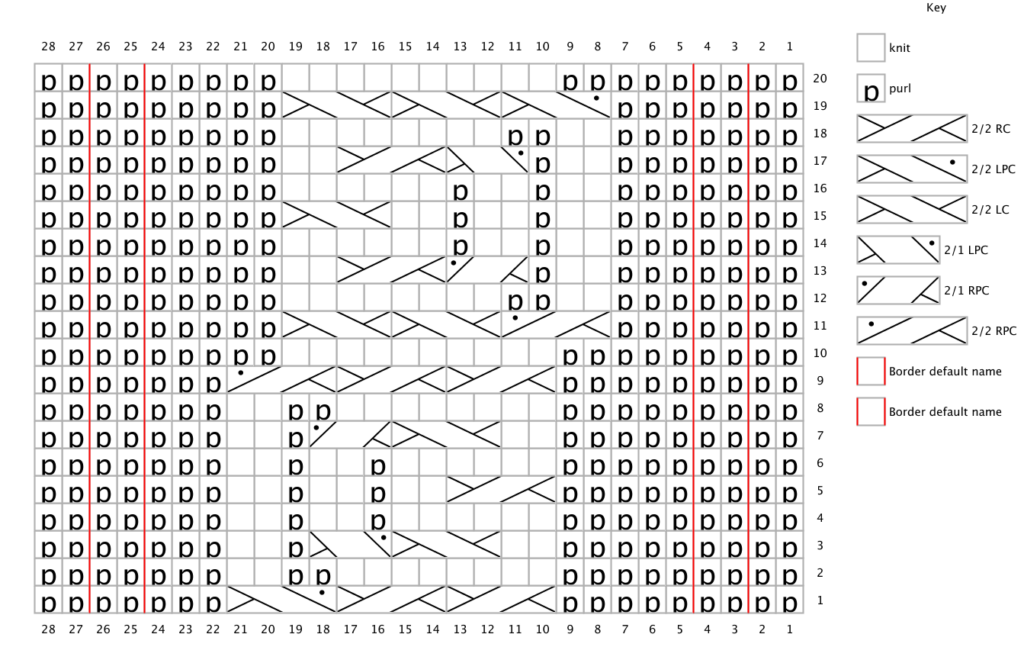
Written instructions for all sizes – left:
Round 1: p5(p7; p9), 2/2 RC x 2, 2/2 LPC, p3(p5, p7).
Round 2: p5(p7; p9), k8, p2, k2, p3(p5, p7).
Round 3: p5(p7; p9), k2, 2/2 LC, 2/1 LPC, p1, k2, p3(p5, p7).
Round 4: p5(p7; p9), k6, (p1, k2) x 2, p3(p5, p7).
Round 5: p5(p7; p9), 2/2 RC, (k2, p1) x 2, k2, p3(p5, p7).
Round 6: repeat round 4.
Round 7: p5(p7; p9), k2, 2/2 LC, 2/1 RPC, p1, k2, p3(p5, p7).
Round 8: repeat round 2.
Round 9: p5(p7; p9), 2/2 RC x 2, 2/2 RPC, p3(p5, p7).
Round 10: p5(p7; p9), k10, p5(p7; p9).
Round 11: p3(p5, p7), 2/2 RPC, 2/2 LC x 2, p5(p7; p9).
Round 12: p3(p5, p7), k2, p2, k8, p5(p7; p9).
Round 13: p3(p5, p7), k2, p1, 2/1 RPC, 2/2 RC, k2, p5(p7; p9).
Round 14: p3(p5, p7), (k2, p1) x 2, k6, p5(p7; p9).
Round 15: p3(p5, p7), (k2, p1) x 2, k2, 2/2 LC, p5(p7; p9).
Round 16: repeat round 14.
Round 17: p3(p5, p7), k2, p1, 2/1 LPC, 2/2 RC, k2, p5(p7; p9).
Round 18: repeat round 12.
Round 19: p3(p5, p7), 2/2 LPC, 2/2 LC x 2, p5(p7; p9).
Round 20: repeat round 10.
Chart for all sizes – left:
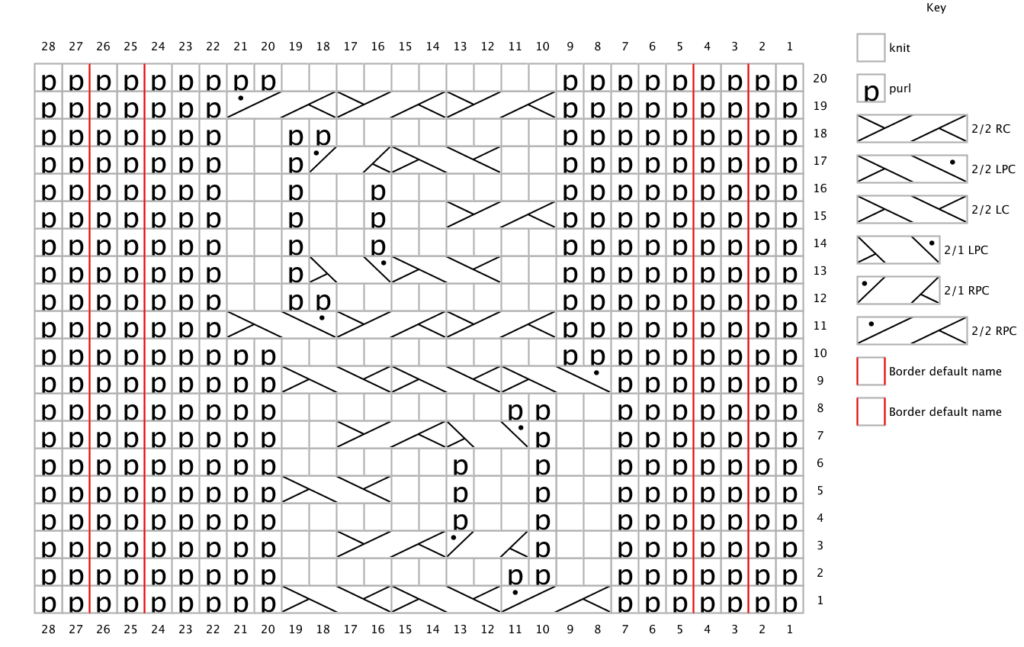
Written instructions for all sizes – right:
Round 1: p3(p5, p7), 2/2 RPC, 2/2 LC x 2, p5(p7; p9).
Round 2: p3(p5, p7), k2, p2, k8, p5(p7; p9).
Round 3: p3(p5, p7), k2, p1, 2/1 RPC, 2/2 RC, k2, p5(p7; p9).
Round 4: p3(p5, p7), (k2, p1) x 2, k6, p5(p7; p9).
Round 5: p3(p5, p7), (k2, p1) x 2, k2, 2/2 LC, p5(p7; p9).
Round 6: repeat round 4.
Round 7: p3(p5, p7), k2, p1, 2/1 LPC, 2/2 RC, k2, p5(p7; p9).
Round 8: repeat round 2.
Round 9: p3(p5, p7), 2/2 LPC, 2/2 LC x 2, p5(p7; p9).
Round 10: p5(p7; p9), k10, p5(p7; p9).
Round 11: p5(p7; p9), 2/2 RC x 2, 2/2 LPC, p3(p5, p7).
Round 12: p5(p7; p9), k8, p2, k2, p3(p5, p7).
Round 13: p5(p7; p9), k2, 2/2 LC, 2/1 LPC, p1, k2, p3(p5, p7).
Round 14: p5(p7; p9), k6, (p1, k2) x 2, p3(p5, p7).
Round 15: p5(p7; p9), 2/2 RC, (k2, p1) x 2, k2, p3(p5, p7).
Round 16: repeat round 14.
Round 17: p5(p7; p9), k2, 2/2 LC, 2/1 RPC, p1, k2, p3(p5, p7).
Round 18: repeat round 12.
Round 19: p5(p7; p9), 2/2 RC x 2, 2/2 RPC, p3(p5, p7).
Round 20: repeat round 10.
Chart for all sizes – right:
Heel Flap:
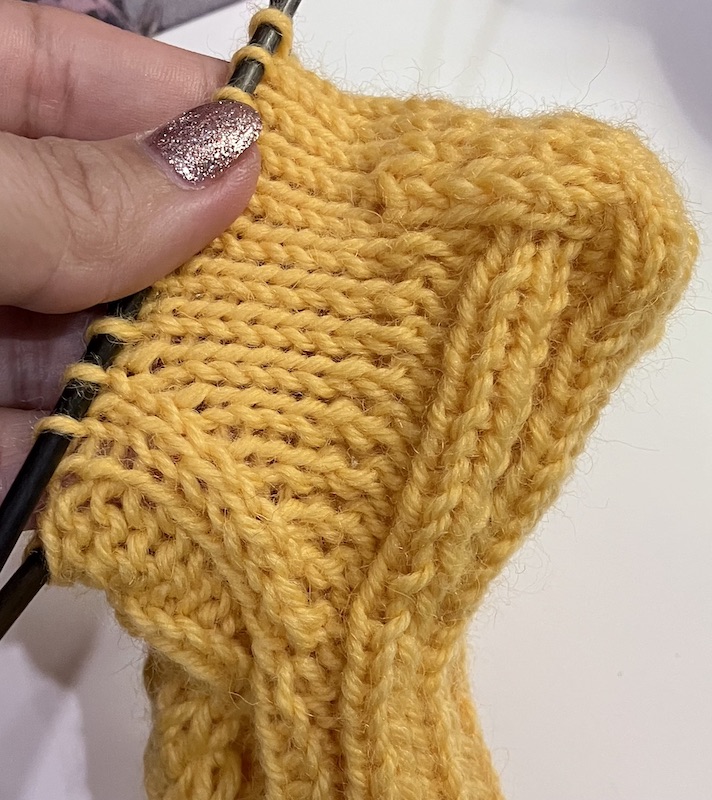
- After completing the final round of the leg pattern on needles 3 and 4, begin the heel flap. Work flat (back and forth) on these stitches (20; 24; 28 sts) for the heel flap.
- As you finish your last round of foot pattern on needles 3 & 4 note, that this is already row 1 of heel flap.
- Make sure that the edges of the heel flap are loopy – this means always slip the first stitch. A good rule of thumb is – if the last stitch of the previous row is a purl stitch then slip knitwise. If the last stitch of the previous row is a knit stitch then slip purlwise.
All sizes:
Row 1: Sl1, (p2, k2) rep to last 3 sts, p2, k1.
Row 2: Sl1, (k2, p2) rep to last 3 sts, k2, p1.
Repeat rows 1 and 2 in total of:
Size S: 10 times;
Size M: 12 times;
Size L: 14 times;
Turn the Heel
- To turn the heel, divide the heel flap stitches into three parts: left, center, and right sections. For example, in size S with 20 stitches: 6 stitches for the left, 8 for the center, and 6 for the right. Use stitch markers if it helps to visualize these sections:
- Size S: 6-8-6 stitches
- Size M: 8-8-8 stitches
- Size L: 9-10-9 stitches
- Row 1 (RS): sl1, k12 (14, 17), ssk, turn.
- Row 2 (WS): sl1, p6 (6, 8), p2tog, turn.
- Row 3 (RS): sl1, k6 (6, 8), ssk, turn.
- Row 4 (WS): sl1, p6 (6, 8), p2tog, turn.
- Repeat Rows 3 and 4 until all side stitches are worked, and you have 8 (8, 10) sts remaining. Divide these stitches between two needles (4 (4; 5) sts per needle).
Gusset:
Sl1, k3(3; 4) from the 1st needle (this will become your last needle after this round). Now k4 (4;5) from the 2nd needle (this will become your 1st needle after this round). Pick up and knit 10 (12, 13) sts along the edge of the heel flap. Work according to the chart or written instructions for the instep stitches (the 20 (24, 28) stitches on hold). Pick up and knit 10 (12, 13) sts along the other side of the heel flap. Knit the last of the heel stitches (4 (4; 5) stitches) – the ones you worked 1st on this round.
Note, that your round is starting here from this point on.
- 1st needle: 14 (16; 18) sts; (half of the heel sts + picked up sts from the edge of the heel flap)
- 2nd & 3rd needle: 20 (24, 28) sts total; (instep stitches; see the foot section)
- 4th needle: 14 (16; 18) sts; (other half of the heel sts + picked up sts from the other edge of the heel flap)
You should now have 48 (56, 64) sts total.
Gusset Decrease Rounds:
While working the gusset decreases on needles 1 and 4, resume the cable pattern on needles 2 and 3 as established for the leg. Ensure the pattern remains centered on the instep by aligning the the first stitch of the chart or written instructions with the center of the needle. If necessary, adjust by shifting stitches slightly after each gusset decrease round.
- Rnd 1: Needle 1: Knit to the last 3 stitches, k2tog, k1. Needles 2 & 3: Work according to the chart or written instructions for the instep stitches (the 20 (24, 28) stitches; see the Foot section). Needle 4: k1, ssk, knit to the end.
- Rnd 2: Needles 1 & 4: Knit all stitches. Needles 2 & 3: Follow the pattern.
- Repeat the gusset decrease rounds 1 & 2 until you have 40 (48, 56) sts.
- Continue working in Stockinette stitch on the sole (needles 1 & 4) and maintain the foot pattern on the top of the foot (needles 2 & 3).
Tip: Double-check your stitch count after each gusset decrease round to ensure accuracy.

Foot pattern:
(needles 2 and 3)
Continue working in Stockinette stitch on the sole (needles 1 & 4) and maintain the foot pattern on the top of the foot (needles 2 & 3) until the sock foot measures 12 (14, 16) cm or 5 cm (2”) shorter than the total foot length. End with the even number round.
Knit one round.
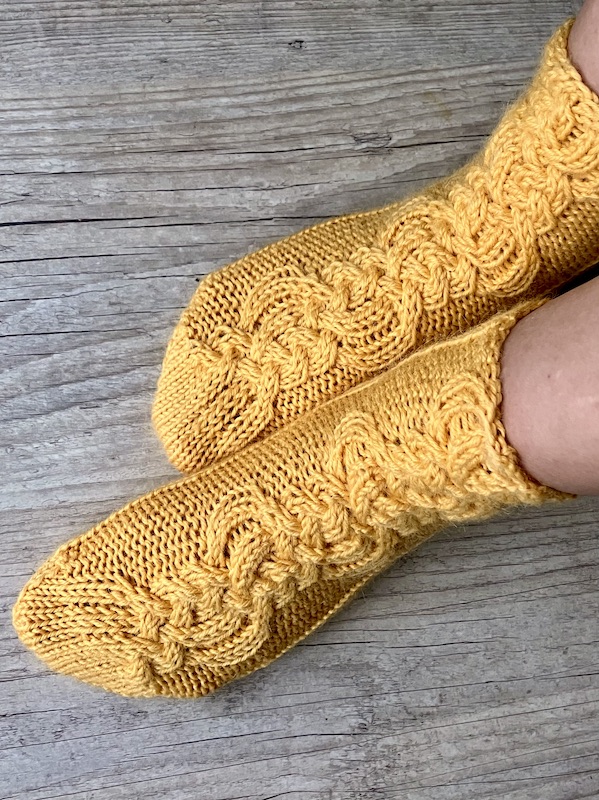
Toe:
Before starting the toe decreases, place the sock on your foot to check the fit and ensure you’ve left enough room for the toe shaping (approximately 5 cm or 2”). Adjust the number of rows in the foot section if needed.
Toe Decrease Rounds:
- Rnd 1: Needles 1 & 3: Knit to the last 3 stitches, k2tog, k1. Needles 2 & 4: K1, ssk, knit to end, k2tog, k1.
- Rnd 2: Knit all stitches.
- Repeat these two rounds until 12 (12, 12) stitches remain.
Finishing:
Graft the remaining stitches using the Kitchener stitch, or bind off and seam the toe closed using mattress stitch.
Tip: For a snug toe, try on the sock as you approach the final decrease rounds to adjust the length as needed.
