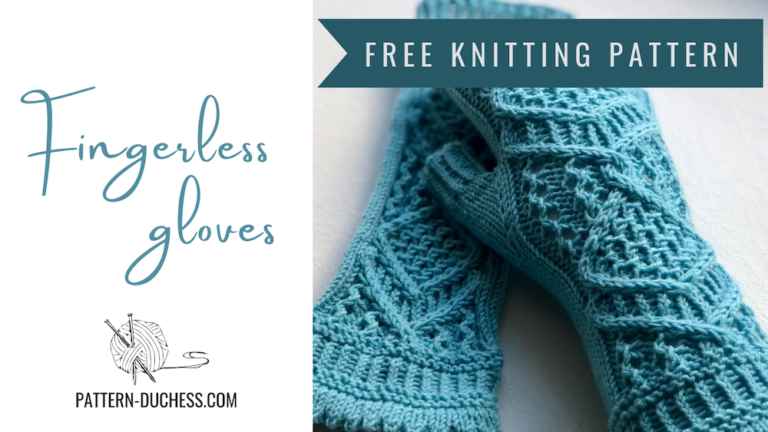
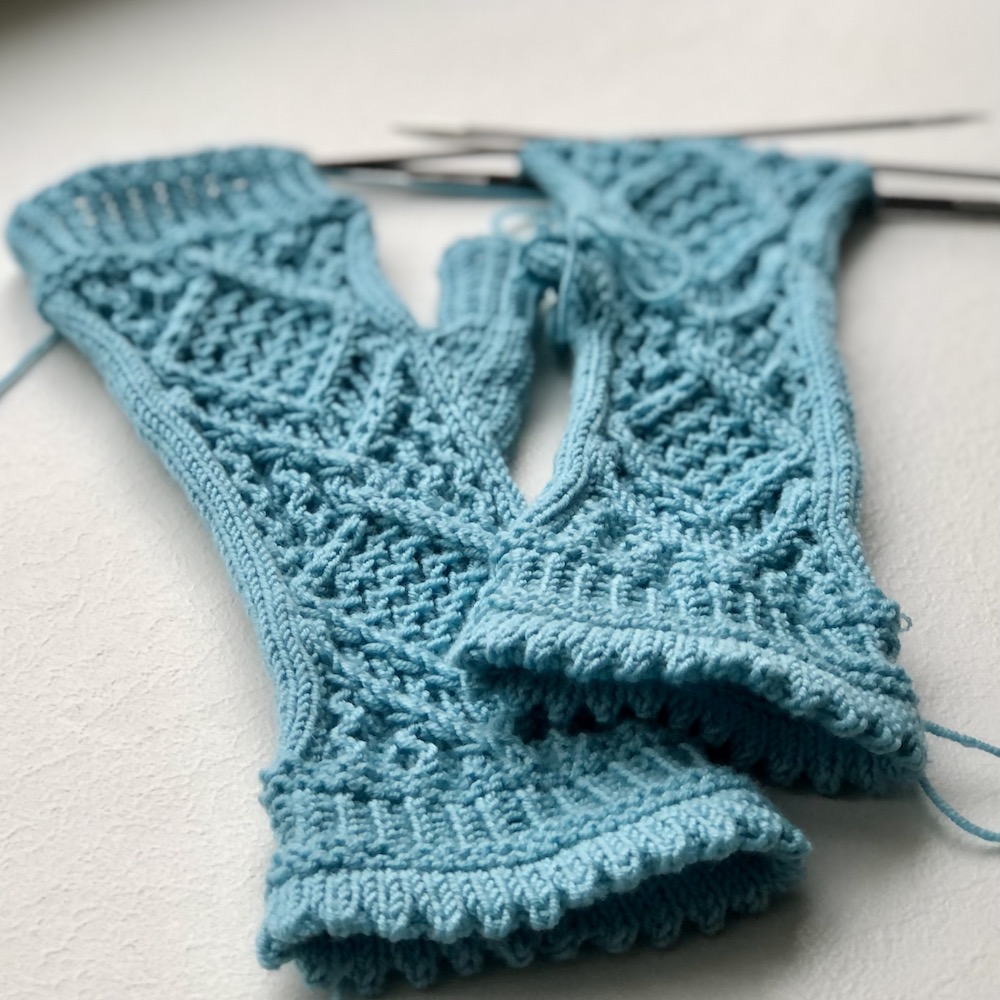
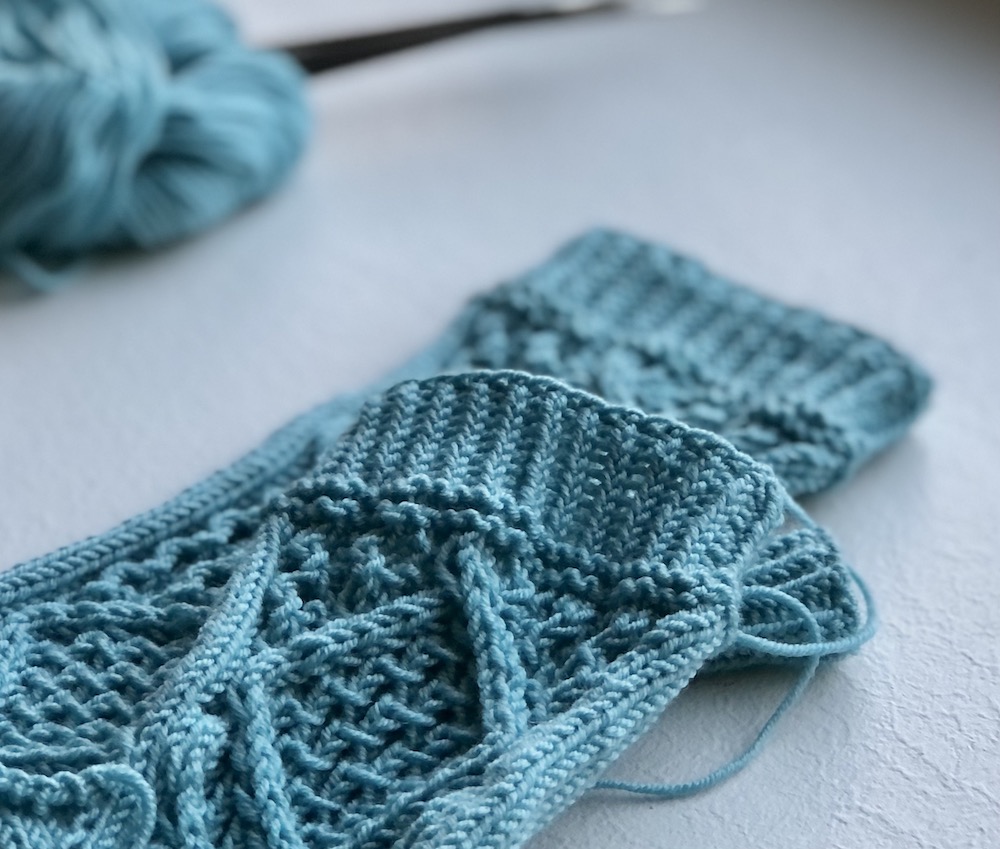
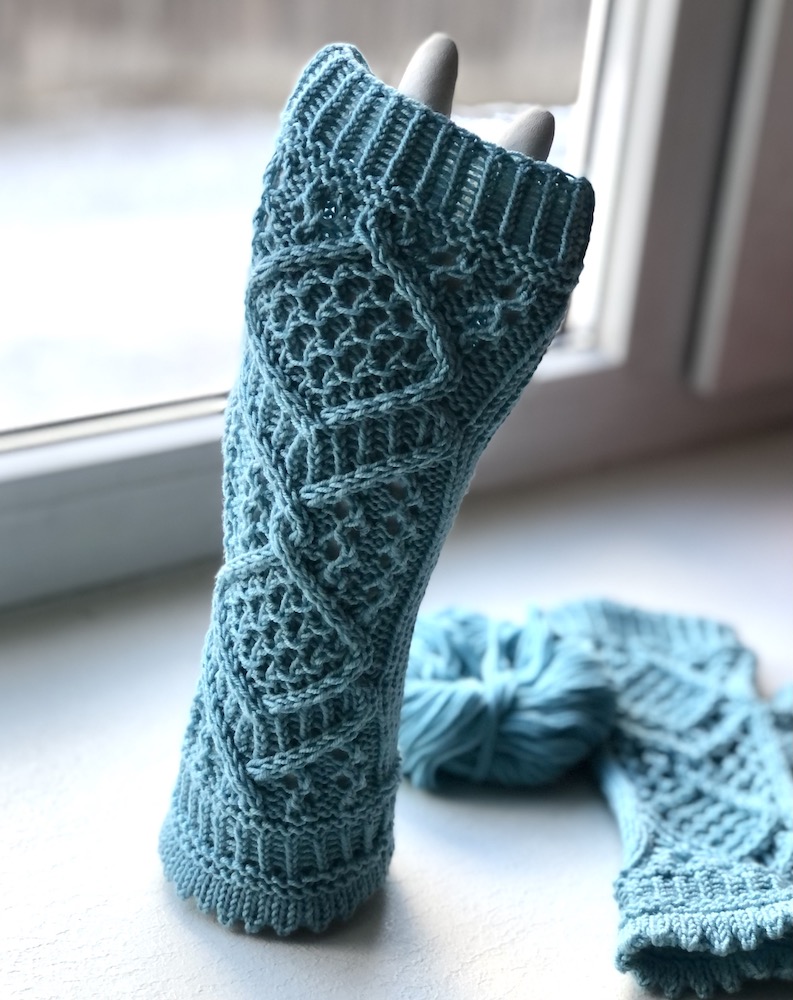
Fingerless gloves are a quick knitting project you can get done with quite a small amount of yarn, and here’s the free knitting pattern for you. Make sure you check the Abbreviations list. Especially that “1/2 RT”. Make sure you understand how it is supposed to be done. I do hope I explained it correctly.
YOU’LL NEED
- Set of 5 double-pointed needles size 3mm / US 2,5
- 2 markers
- Stitch holder
- Cable needle
- 100 g / 3.52 oz of fine yarn or sock yarn – I used 100% merino wool
„DROPS Baby Merino“ 50g (1.76oz) = approx 175m (191 yards)
SIZE (circumference of the hand)
- S: 17 cm (6, 5 in)
- M: 19 cm (7,5 in)
- L: 21 cm (8, 5 in)
GAUGE
10 x10 cm ( x ) = 24 sts x 32 rows
ABBREVIATIONS
- rnd(s) – round(s);
- st(s) – stitch(es);
- cn – cable needle;
- k – knit;
- p – purl;
- YO – yarn over;
- k2tog – knit 2 together;
- ssk – slip, slip, knit slipped stitches together;
- inc1P – increase 1 stitch by picking up yarn between stitches and purling it through;
- k tbl – knit 1 stitch through the back loop;
- 2/1/2 LPC – slip 2 sts to cn and hold in front, slip next st to the second cn and hold in back, k2, p1 from back cn, k2 from front cn;
- 2/2 RC – slip 2 sts to cn and hold in back, k2, k2 from cn;
- 2/2 LC – slip 2 sts to cn and hold in front, k2, k2 from cn;
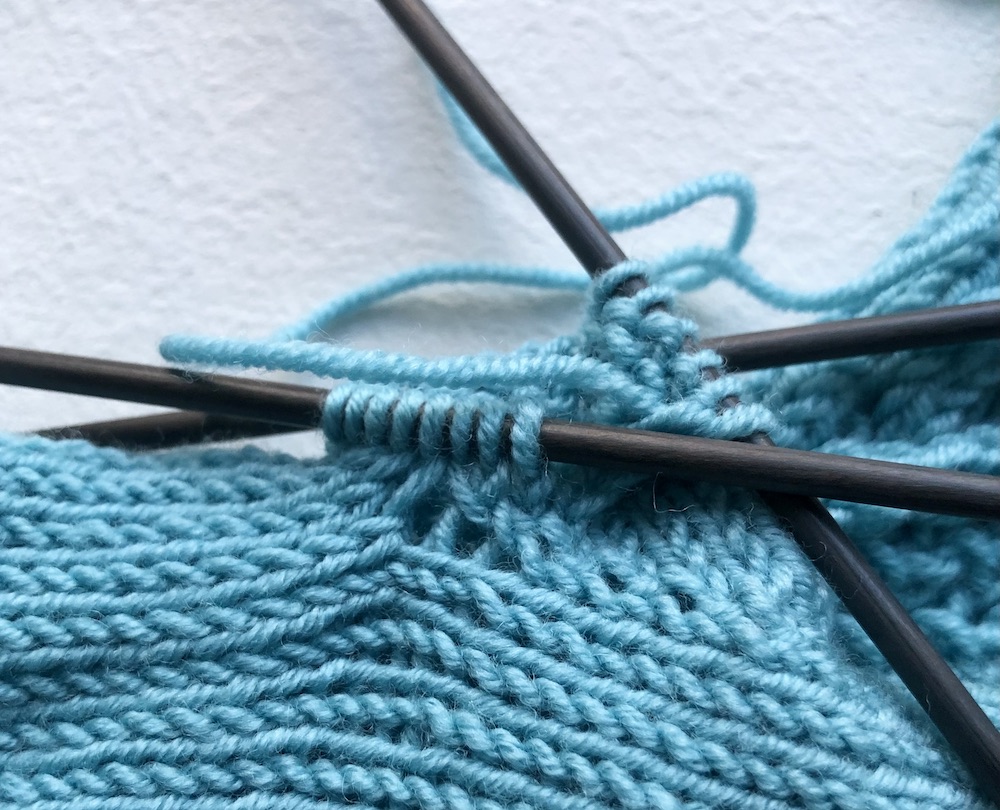
- 1/2 RT – (worked over 3 stitches) knit 1 st, yarn over, knit 1 stitch; pass those 3 stitches back to left-hand needle; now on the left needle pass 4th stitch over 3 stitches on the right (over the k1, yo, k1); now pass those 3 sts back to your right-hand needle;
- PM – place marker;
- SM – slip marker;
- M1L – make 1 stitch slanting to left;
- M1R – make 1 stitch slanting to right;
LACE KNITTING WORKBOOK FOR (ABSOLUTE) BEGINNERS
Lace Knitting Workbook for Beginners will take away the complexity and give you everything simplified. It will show you what tools you will need, how to easily choose the yarn and needles, and give you tips on how to save money on most of it.
CUFF
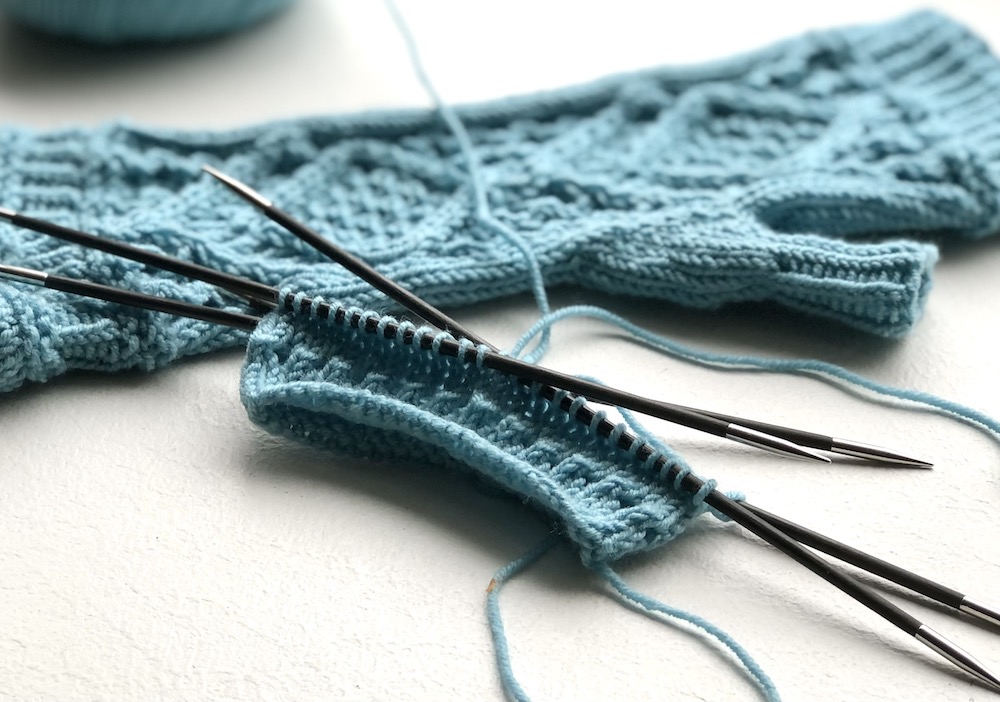
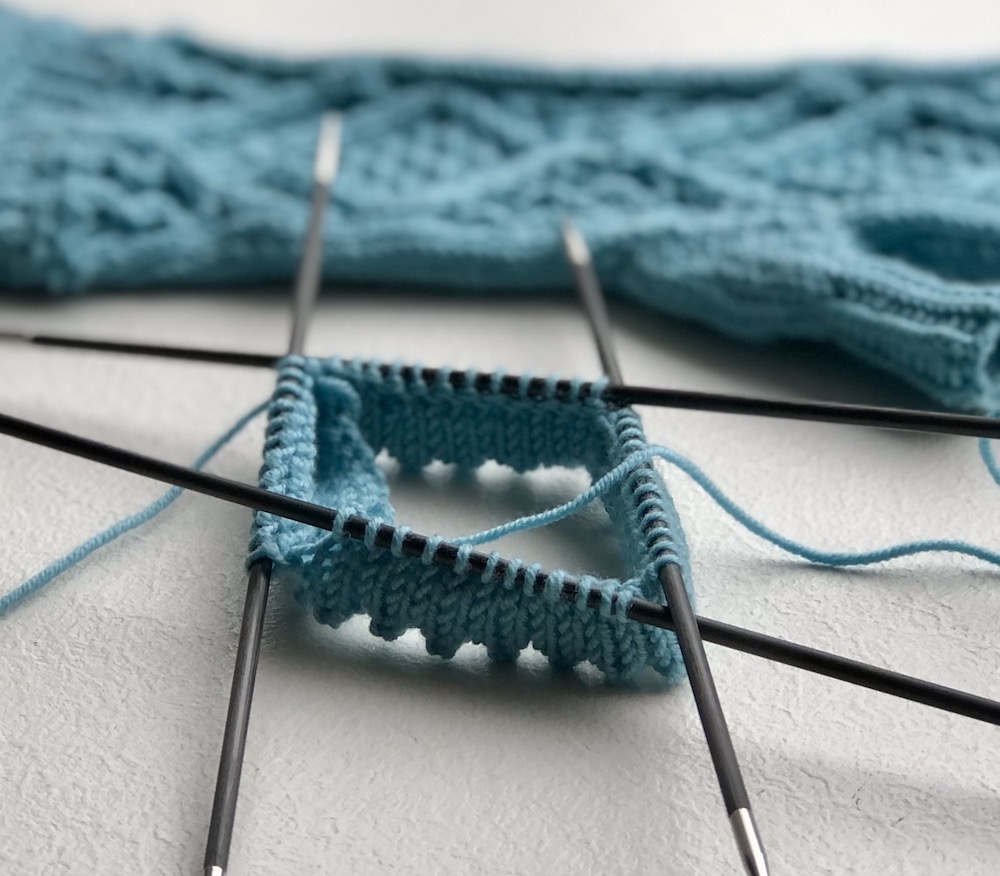
Cast on 48 (56; 64) stitches and join to form the round. Divide stitches evenly between 4 needles.
Rnd 1-5: k;
Rnd 6: *YO, k2tog; rep from* to end;
Rnd 7-11: k;
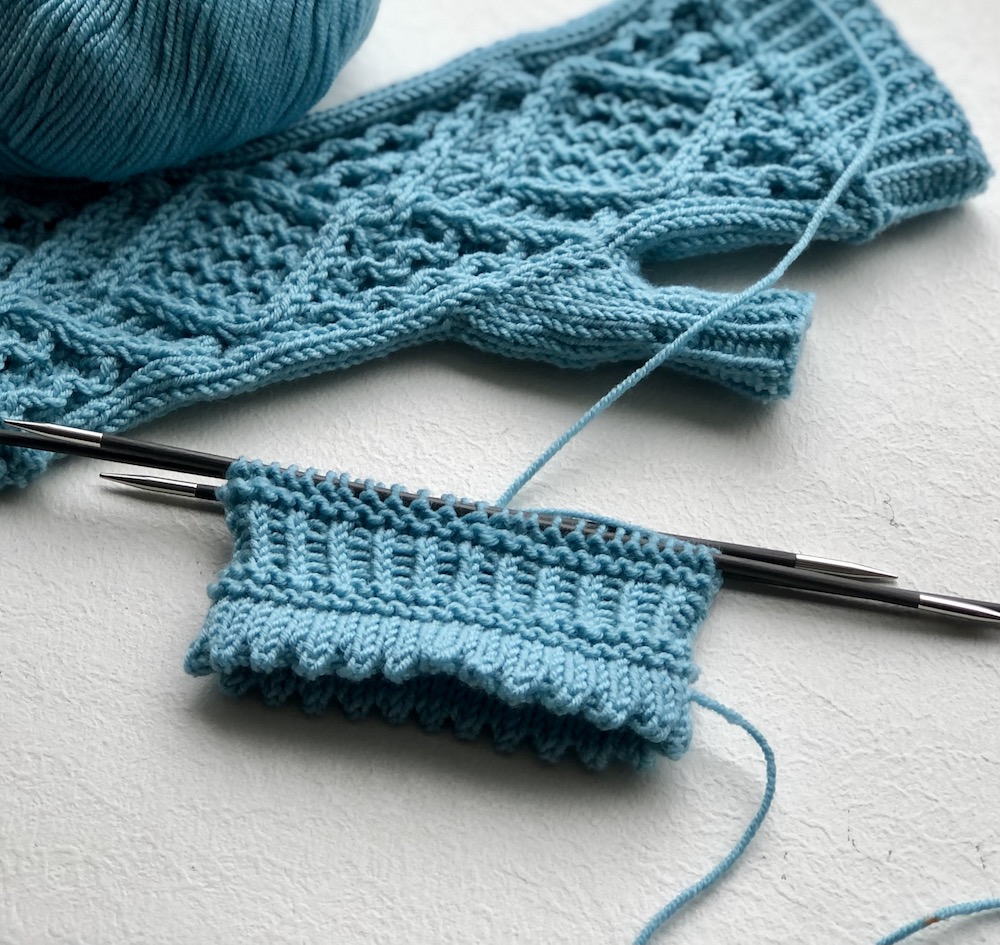
Turning the edge (you can skip this step and just sew the edge inside later on).
Fold the lower edge of the cuff inside so that rnd 6 will be a new lower edge. Knit stitches of rnd 11 and cast on stitches together – With a right-hand needle, pick up the first stitch of cast on rnd and slip on the left-hand needle. Knit 1st stitch of rnd 11 and slipped stitch of cast on rnd together. Now pick up 2nd stitch of cast on rnd and slip on the left-hand needle – knit this and 2nd stitch of rnd 11 together. And so on.
Rnd 12: p;
Rnd 13: k;
Rnd 14: p;
Rnd 15: k;
Rnd 16-20: (p1, k tbl) rep to end;
Rnd 21: k;
Rnd 22: p;
Rnd 23: k;
Rnd 24: p;
Put stitches from the first two needles onto one needle and arrange stitches so that you have 24-12-12 (28-14-14; 32-16-16) stitches on your needles.
Pattern preparation round:
Size S: (p2, k2) x 3, inc1P, (k2, p2) x 3, k to end of rnd;
Size M: p2, (p2, k2) x 3, inc1P, (k2, p2) x 3, p2, k to end of rnd;
Size L: k2, p2, (p2, k2) x 3, inc1P, (k2, p2) x 3, p2, k to end of rnd;
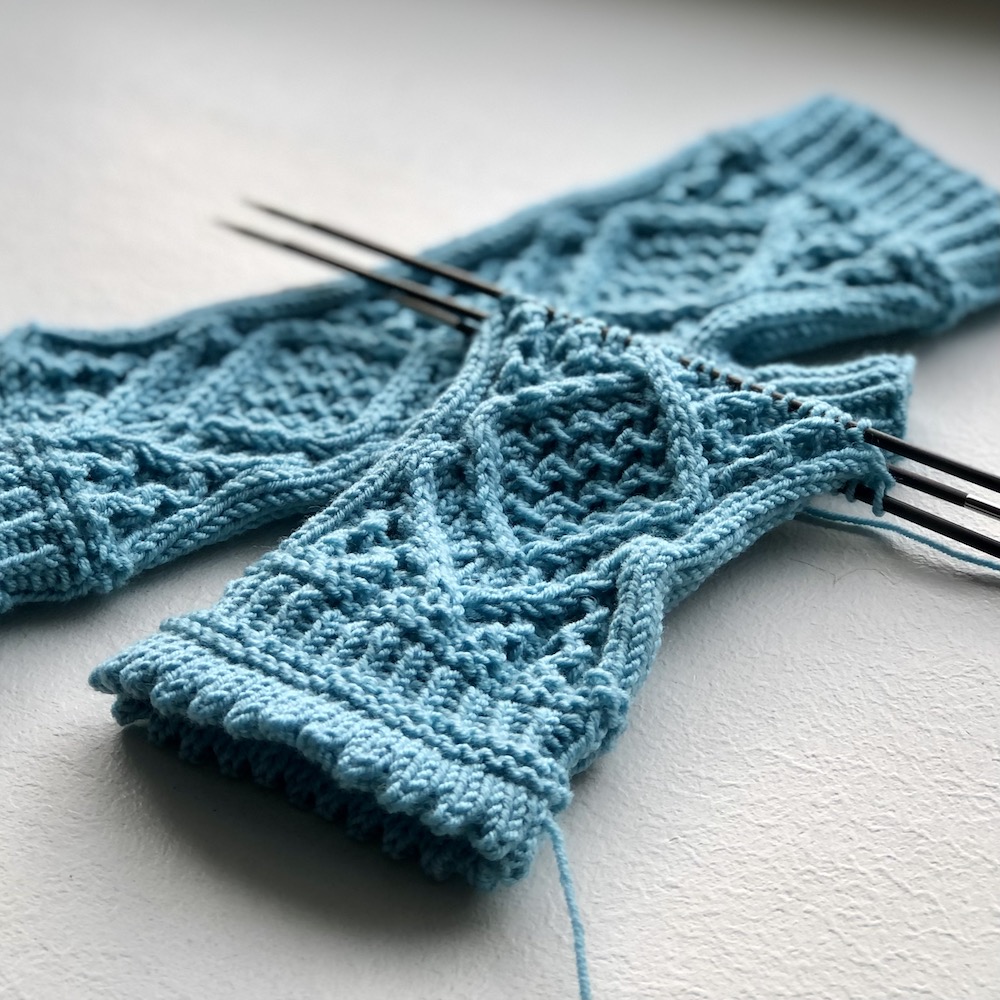
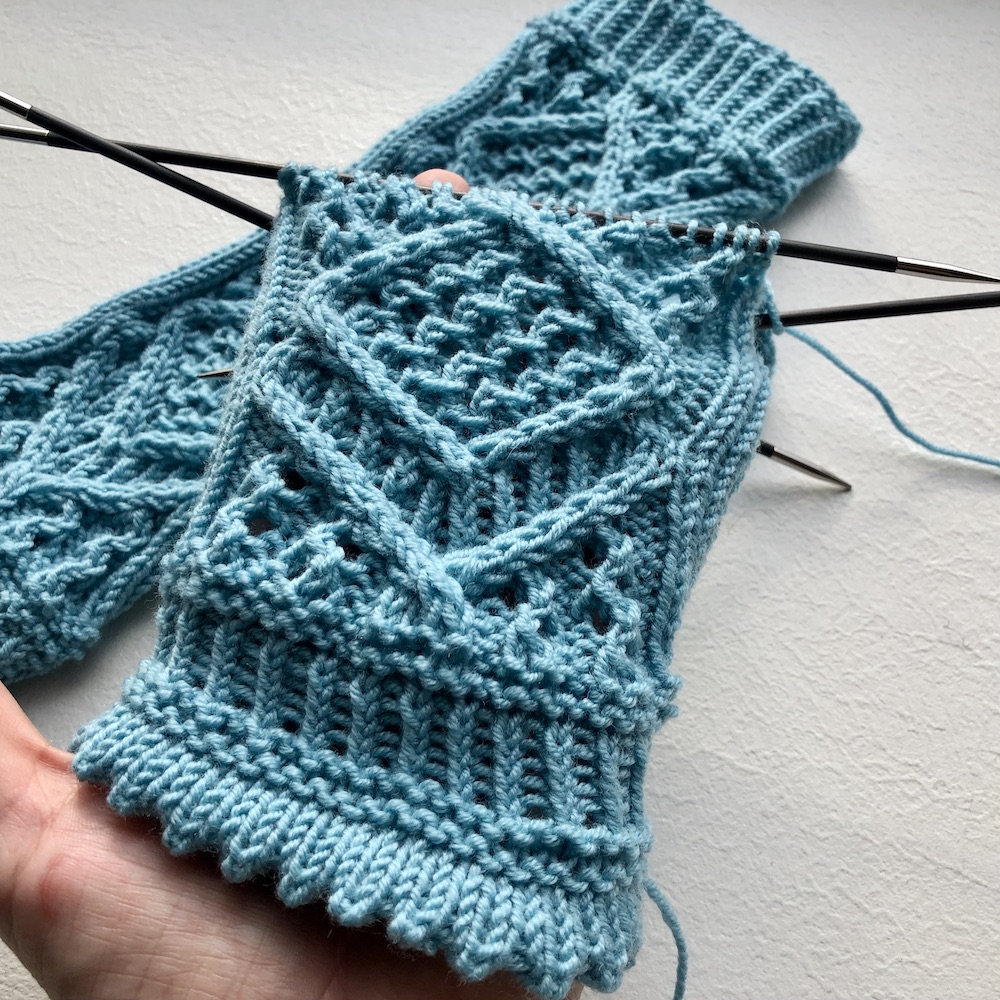
Start with the pattern. Make 1 pattern repeat and start with gusset increases.
NOTE!
You will be knitting the pattern only on the first needle – the other two needles will be just knit stitches.
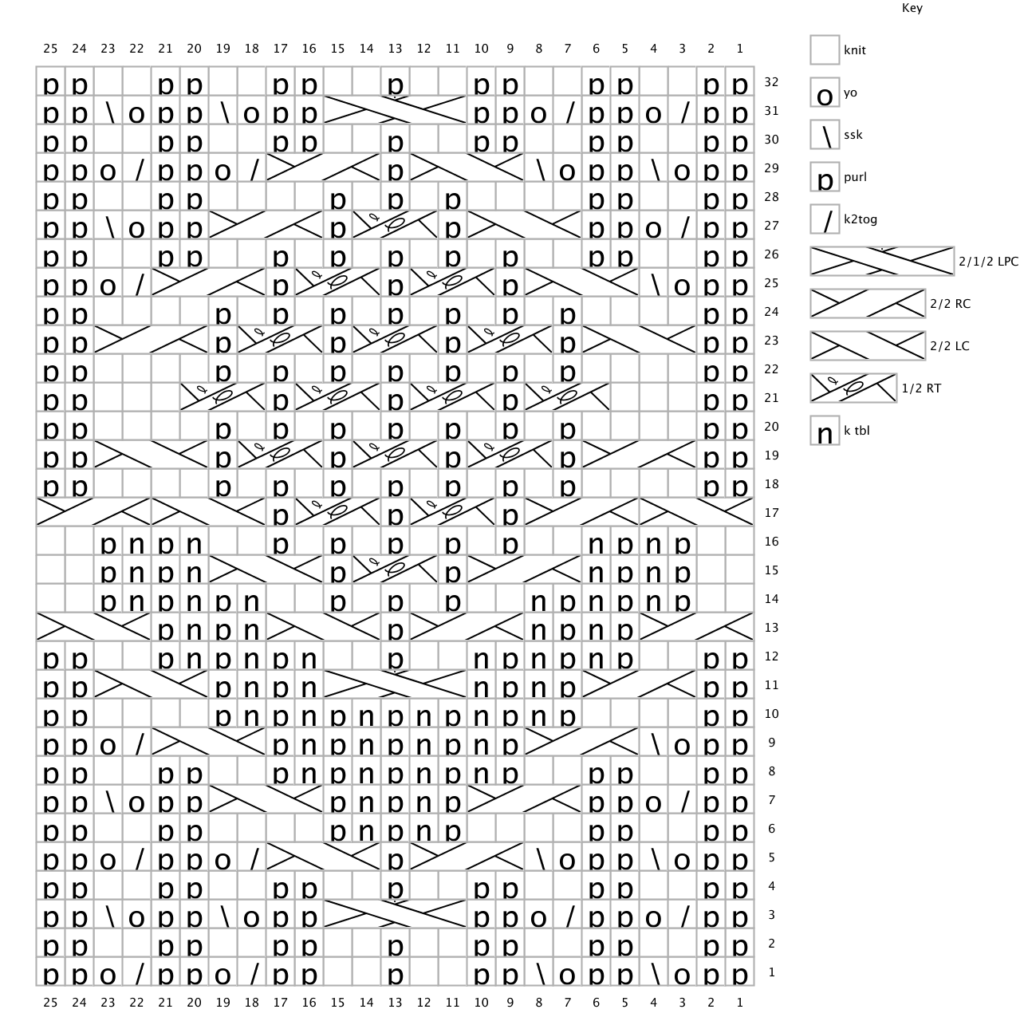
Fingerless gloves size S
Rnd 1: (P2, yo, ssk) x 2, p2, k2, p1, k2, (p2, k2tog, yo) x 2, p2.
Rnd 2: (P2, k2) x 3, p1, (k2, p2) x 3.
Rnd 3: (P2, k2tog, yo) x 2, p2, 2/1/2 LPC, (p2, yo, ssk) x 2, p2.
Rnd 4: Repeat round 2.
Rnd 5: (P2, yo, ssk) x 2, 2/2 RC, p1, 2/2 LC, (k2tog, yo, p2) x 2.
Rnd 6: P2, k2, p2, k4, (p1, k tbl) x 2, p1, k4, p2, k2, p2.
Rnd 7: P2, k2tog, yo, p2, 2/2 RC, (p1, k tbl) x 2, p1, 2/2 LC, p2, yo, ssk, p2.
Rnd 8: (P2, k2) x 2, (p1, k tbl) x 4, p1, (k2, p2) x 2.
Rnd 9: P2, yo, ssk, 2/2 RC, (p1, k tbl) x 4, p1, 2/2 LC, k2tog, yo, p2.
Rnd 10: P2, k4, (p1, k tbl) x 6, p1, k4, p2.
Rnd 11: P2, 2/2 RC, (p1, k tbl) x 2, 2/1/2 LPC, (k tbl, p1) x 2, 2/2 LC, p2.
Rnd 12: P2, k2, (p1, k tbl) x 3, k2, p1, k2, (k tbl, p1) x 3, k2, p2.
Rnd 13: 2/2 RC, (p1, k tbl) x 2, 2/2 RC, p1, 2/2 LC, (k tbl, p1) x 2, 2/2 LC.
Rnd 14: K2, (p1, k tbl) x 3, k2, (p1, k1) x 2, p1, k2, (k tbl, p1) x 3, k2.
Rnd 15: K2, (p1, k tbl) x 2, 2/2 RC, p1, 1/2 RT, p1, 2/2 LC, (k tbl, p1) x 2, k2.
Rnd 16: K2, (p1, k tbl) x 2, k2, (p1, k1) x 4, p1, k2, (k tbl, p1) x 2, k2.
Rnd 17: 2/2 LC, 2/2 RC, (p1, 1/2 RT) x 2, p1, 2/2 LC, 2/2 RC.
Rnd 18: P2, k4, (p1, k1) x 6, p1, k4, p2.
Rnd 19: P2, 2/2 RC, (p1, 1/2 RT) x 3, p1, 2/2 LC, p2.
Rnd 20: Repeat round 18.
Rnd 21: P2, k3, (1/2 RT, p1) x 3, 1/2 RT, k3, p2.
Rnd 22: Repeat round 18.
Rnd 23: P2, 2/2 LC, (p1, 1/2 RT) x 3, p1, 2/2 RC, p2.
Rnd 24: Repeat round 18.
Rnd 25: P2, yo, ssk, 2/2 LC, (p1, 1/2 RT) x 2, p1, 2/2 RC, k2tog, yo, p2.
Rnd 26: (P2, k2) x 2, (p1, k1) x 4, p1, (k2, p2) x 2.
Rnd 27: P2, k2tog, yo, p2, 2/2 LC, p1, 1/2 RT, p1, 2/2 RC, p2, yo, ssk, p2.
Rnd 28: P2, k2, p2, k4, (p1, k1) x 2, p1, k4, p2, k2, p2.
Rnd 29: (P2, yo, ssk) x 2, 2/2 LC, p1, 2/2 RC, (k2tog, yo, p2) x 2.
Rnd 30: Repeat round 2.
Rnd 31: Repeat round 3.
Rnd 32: Repeat round 2.
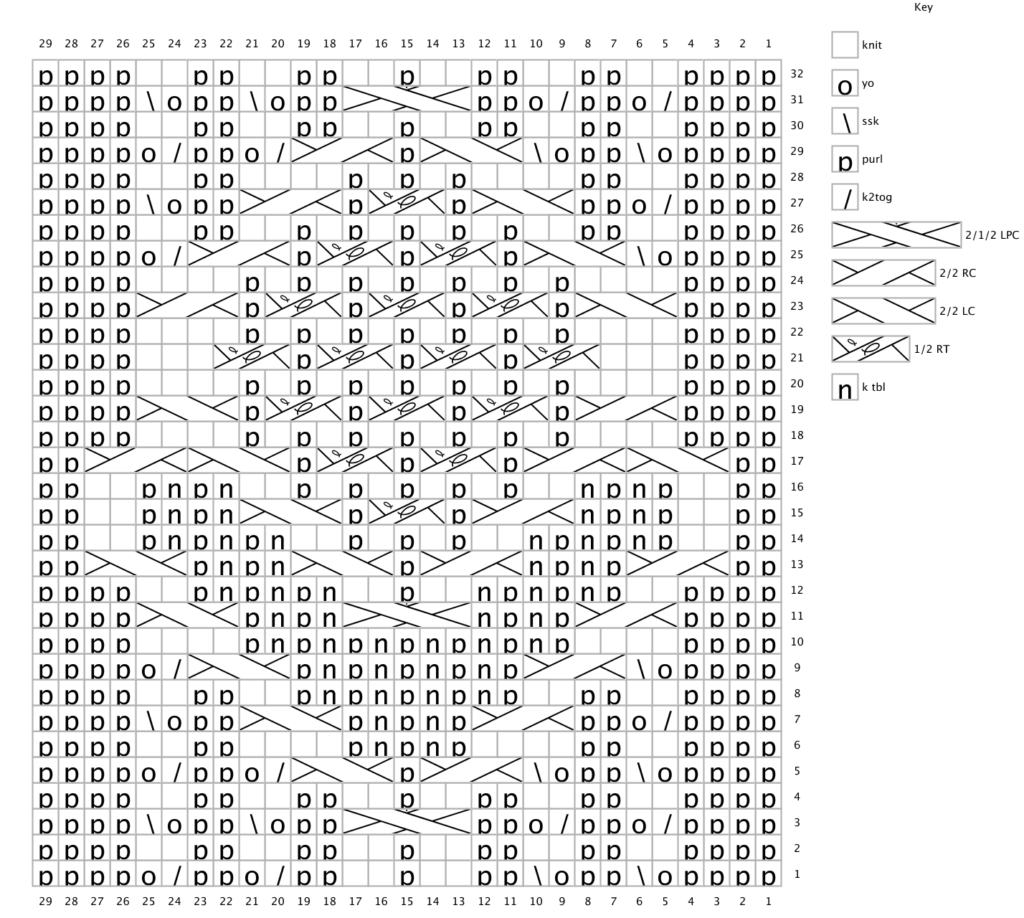
Fingerless gloves size M
Rnd 1: P2, (p2, yo, ssk) x 2, p2, k2, p1, k2, (p2, k2tog, yo) x 2, p4.
Rnd 2: P2, (p2, k2) x 3, p1, (k2, p2) x 3, p2.
Rnd 3: P2, (p2, k2tog, yo) x 2, p2, 2/1/2 LPC, (p2, yo, ssk) x 2, p4.
Rnd 4: Repeat round 2.
Rnd 5: P2, (p2, yo, ssk) x 2, 2/2 RC, p1, 2/2 LC, (k2tog, yo, p2) x 2, p2.
Rnd 6: P4, k2, p2, k4, (p1, k tbl) x 2, p1, k4, p2, k2, p4.
Rnd 7: P4, k2tog, yo, p2, 2/2 RC, (p1, k tbl) x 2, p1, 2/2 LC, p2, yo, ssk, p4.
Rnd 8: P2, (p2, k2) x 2, (p1, k tbl) x 4, p1, (k2, p2) x 2, p2.
Rnd 9: P4, yo, ssk, 2/2 RC, (p1, k tbl) x 4, p1, 2/2 LC, k2tog, yo, p4.
Rnd 10: P4, k4, (p1, k tbl) x 6, p1, k4, p4.
Rnd 11: P4, 2/2 RC, (p1, k tbl) x 2, 2/1/2 LPC, (k tbl, p1) x 2, 2/2 LC, p4.
Rnd 12: P4, k2, (p1, k tbl) x 3, k2, p1, k2, (k tbl, p1) x 3, k2, p4.
Rnd 13: P2, 2/2 RC, (p1, k tbl) x 2, 2/2 RC, p1, 2/2 LC, (k tbl, p1) x 2, 2/2 LC, p2.
Rnd 14: P2, k2, (p1, k tbl) x 3, k2, (p1, k1) x 2, p1, k2, (k tbl, p1) x 3, k2, p2.
Rnd 15: P2, k2, (p1, k tbl) x 2, 2/2 RC, p1, 1/2 RT, p1, 2/2 LC, (k tbl, p1) x 2, k2, p2.
Rnd 16: P2, k2, (p1, k tbl) x 2, k2, (p1, k1) x 4, p1, k2, (k tbl, p1) x 2, k2, p2.
Rnd 17: P2, 2/2 LC, 2/2 RC, (p1, 1/2 RT) x 2, p1, 2/2 LC, 2/2 RC, p2.
Rnd 18: P4, k4, (p1, k1) x 6, p1, k4, p4.
Rnd 19: P4, 2/2 RC, (p1, 1/2 RT) x 3, p1, 2/2 LC, p4.
Rnd 20: Repeat round 18.
Rnd 21: P4, k3, (1/2 RT, p1) x 3, 1/2 RT, k3, p4.
Rnd 22: Repeat round 18.
Rnd 23: P4, 2/2 LC, (p1, 1/2 RT) x 3, p1, 2/2 RC, p4.
Rnd 24: Repeat round 18.
Rnd 25: P4, yo, ssk, 2/2 LC, (p1, 1/2 RT) x 2, p1, 2/2 RC, k2tog, yo, p4.
Rnd 26: P2, (p2, k2) x 2, (p1, k1) x 4, p1, (k2, p2) x 2, p2.
Rnd 27: P4, k2tog, yo, p2, 2/2 LC, p1, 1/2 RT, p1, 2/2 RC, p2, yo, ssk, p4.
Rnd 28: P4, k2, p2, k4, (p1, k1) x 2, p1, k4, p2, k2, p4.
Rnd 29: P2, (p2, yo, ssk) x 2, 2/2 LC, p1, 2/2 RC, (k2tog, yo, p2) x 2, p2.
Rnd 30: Repeat round 2.
Rnd 31: Repeat round 3.
Rnd 32: Repeat round 2.
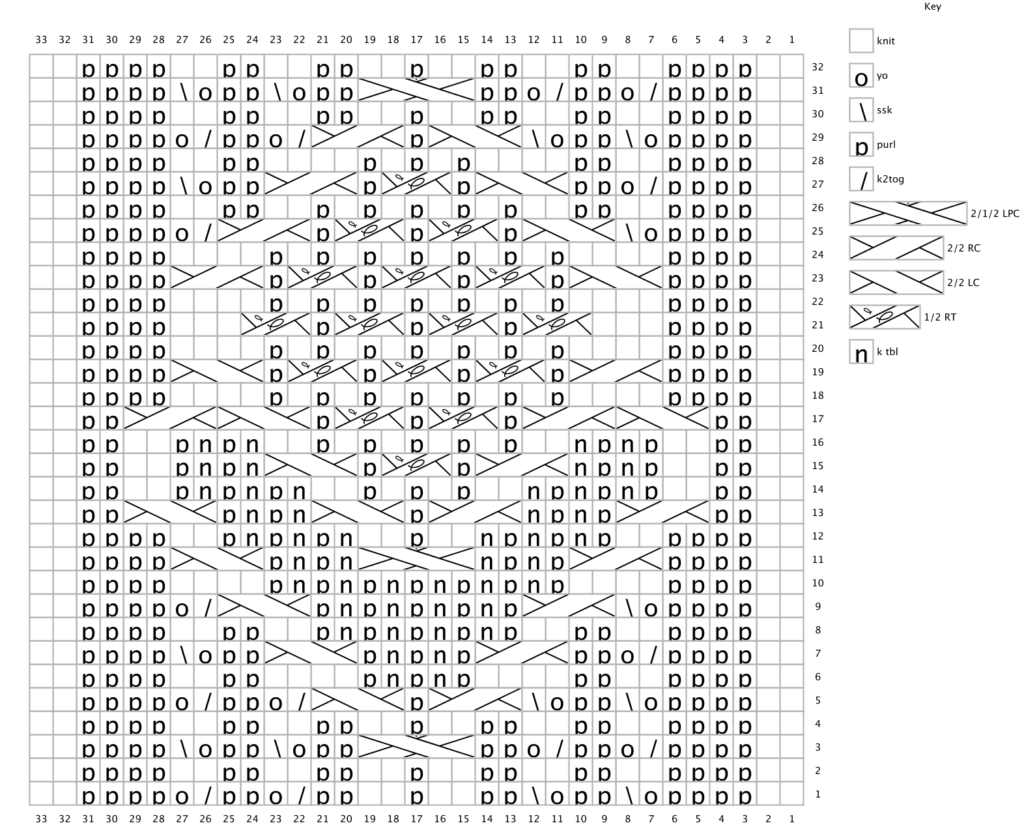
Fingerless gloves size L
Rnd 1: K2, p2, (p2, yo, ssk) x 2, p2, k2, p1, k2, (p2, k2tog, yo) x 2, p4, k2.
Rnd 2: K2, p2, (p2, k2) x 3, p1, (k2, p2) x 3, p2, k2.
Rnd 3: K2, p2, (p2, k2tog, yo) x 2, p2, 2/1/2 LPC, (p2, yo, ssk) x 2, p4, k2.
Rnd 4: Repeat round 2.
Rnd 5: K2, p2, (p2, yo, ssk) x 2, 2/2 RC, p1, 2/2 LC, (k2tog, yo, p2) x 2, p2, k2.
Rnd 6: K2, p4, k2, p2, k4, (p1, k tbl) x 2, p1, k4, p2, k2, p4, k2.
Rnd 7: K2, p4, k2tog, yo, p2, 2/2 RC, (p1, k tbl) x 2, p1, 2/2 LC, p2, yo, ssk, p4, k2.
Rnd 8: K2, p2, (p2, k2) x 2, (p1, k tbl) x 4, p1, (k2, p2) x 2, p2, k2.
Rnd 9: K2, p4, yo, ssk, 2/2 RC, (p1, k tbl) x 4, p1, 2/2 LC, k2tog, yo, p4, k2.
Rnd 10: K2, p4, k4, (p1, k tbl) x 6, p1, k4, p4, k2.
Rnd 11: K2, p4, 2/2 RC, (p1, k tbl) x 2, 2/1/2 LPC, (k tbl, p1) x 2, 2/2 LC, p4, k2.
Rnd 12: K2, p4, k2, (p1, k tbl) x 3, k2, p1, k2, (k tbl, p1) x 3, k2, p4, k2.
Rnd 13: K2, p2, 2/2 RC, (p1, k tbl) x 2, 2/2 RC, p1, 2/2 LC, (k tbl, p1) x 2, 2/2 LC, p2, k2.
Rnd 14: K2, p2, k2, (p1, k tbl) x 3, k2, (p1, k1) x 2, p1, k2, (k tbl, p1) x 3, k2, p2, k2.
Rnd 15: K2, p2, k2, (p1, k tbl) x 2, 2/2 RC, p1, 1/2 RT, p1, 2/2 LC, (k tbl, p1) x 2, k2, p2, k2.
Rnd 16: K2, p2, k2, (p1, k tbl) x 2, k2, (p1, k1) x 4, p1, k2, (k tbl, p1) x 2, k2, p2, k2.
Rnd 17: K2, p2, 2/2 LC, 2/2 RC, (p1, 1/2 RT) x 2, p1, 2/2 LC, 2/2 RC, p2, k2.
Rnd 18: K2, p4, k4, (p1, k1) x 6, p1, k4, p4, k2.
Rnd 19: K2, p4, 2/2 RC, (p1, 1/2 RT) x 3, p1, 2/2 LC, p4, k2.
Rnd 20: Repeat round 18.
Rnd 21: K2, p4, k3, (1/2 RT, p1) x 3, 1/2 RT, k3, p4, k2.
Rnd 22: Repeat round 18.
Rnd 23: K2, p4, 2/2 LC, (p1, 1/2 RT) x 3, p1, 2/2 RC, p4, k2.
Rnd 24: Repeat round 18.
Rnd 25: K2, p4, yo, ssk, 2/2 LC, (p1, 1/2 RT) x 2, p1, 2/2 RC, k2tog, yo, p4, k2.
Rnd 26: K2, p2, (p2, k2) x 2, (p1, k1) x 4, p1, (k2, p2) x 2, p2, k2.
Rnd 27: K2, p4, k2tog, yo, p2, 2/2 LC, p1, 1/2 RT, p1, 2/2 RC, p2, yo, ssk, p4, k2.
Rnd 28: K2, p4, k2, p2, k4, (p1, k1) x 2, p1, k4, p2, k2, p4, k2.
Rnd 29: K2, p2, (p2, yo, ssk) x 2, 2/2 LC, p1, 2/2 RC, (k2tog, yo, p2) x 2, p2, k2.
Rnd 30: Repeat round 2.
Rnd 31: Repeat round 3.
Rnd 32: Repeat round 2.
GUSSET
While continuing the pattern on the first needle, start increasing according to which hands glove you are knitting. Each increase round adds 2 stitches to the gusset (number of knit stitches between markers).
Between each increase round will be a knitting round. NO INCREASES are made on that round.
After the gusset increases you will have:
Size S: 13 stitches between the markers (total of 6 increase rounds);
Size M: 15 stitches between the markers (total of 7 increase rounds);
Size L: 17 stitches between the markers (total of 8 increase rounds);
LEFT HAND
Increases will be made on the third needle (knit the first needle following the pattern as before, knit 2nd needle, and start increasing on 3rd needle).
- k to last 3 sts, PM, M1R, k1, M1L, PM, k2;
- k;
- k to marker, SM, M1R, k3, M1L, SM, k2;
- k;
- k to marker, SM, M1R, k5, M1L, SM, k2;
- k;
- k to marker, SM, M1R, k7, M1L, SM, k2;
- k;
- k to marker, SM, M1R, k9, M1L, SM k2;
- k;
- k to marker, SM, M1R, k11, M1L, SM, k2;
- Size S only: k to marker, slip 13 sts on stitch holder, cast on 1, k2; -> move on with the next part
Size M & L: k; - Sizes M & L: k to marker, SM, M1R, k13, M1L, SM, k2;
- Size M only: k to marker, slip 15 sts on stitch holder, cast on 1, k2; -> move on with the next part
Size L: k; - Size L: k to marker, SM, M1R, k15, M1L, SM, k2;
- k to marker, slip 17 sts on stitch holder, cast on 1, k2; -> move on with the next part
RIGHT HAND
Increases will be made on the second needle (knit the first needle following the pattern as before, start increasing on the 2nd needle, and knit the 3rd needle).
- k2, PM, M1R, k1, M1L, PM, k to end;
- k;
- k2, SM, M1R, k3, M1L, SM, k to end;
- k;
- k2, SM, M1R, k5, M1L, SM, k to end;
- k;
- k2, SM, M1R, k7, M1L, SM, k to end;
- k;
- k2, SM, M1R, k9, M1L, SM, k to end;
- k;
- k2, SM, M1R, k11, M1L, SM, k to end;
- Size S only: k2, slip 13 sts on stitch holder, cast on 1, k to end; -> move on with the next part
Sizes M & L: k; - Sizes M & L: K2, SM, M1R, k13, M1L, SM, k to end
- Size M only: k2, slip 15 sts on stitch holder, cast on 1, k to end; -> move on with the next part
Size L: k; - Size L: K2, SM, M1R, k15, M1L, SM, k to end
- k2, slip 17 sts on stitch holder, cast on 1, k to end; -> move on with the next part
PALM
Continue knitting the pattern on the first needle and just knit the other two needles until you have finished with 1 pattern repeat.
FINISHING
Divider round:
- Size S: k11, k2tog, k to end;
- Size M: k13, k2tog, k to end;
- Size L: k15, k2tog, k to end;
At this point, you can divide the first needle stitches between two needles again (knitting with 5 needles).
- Rnd 1: p;
- Rnd 2: k;
- Rnd 3: p;
- Rnd 4: k;
- [Size S] Rnds 5 – 12: (p1, k tbl) rep to end of rnd;
[Size M] Rnds 5 – 16: (p1, k tbl) rep to end of rnd;
[Size L] Rnds 5 – 20: (p1, k tbl) rep to end of rnd;
Cast off loosely.
THUMB
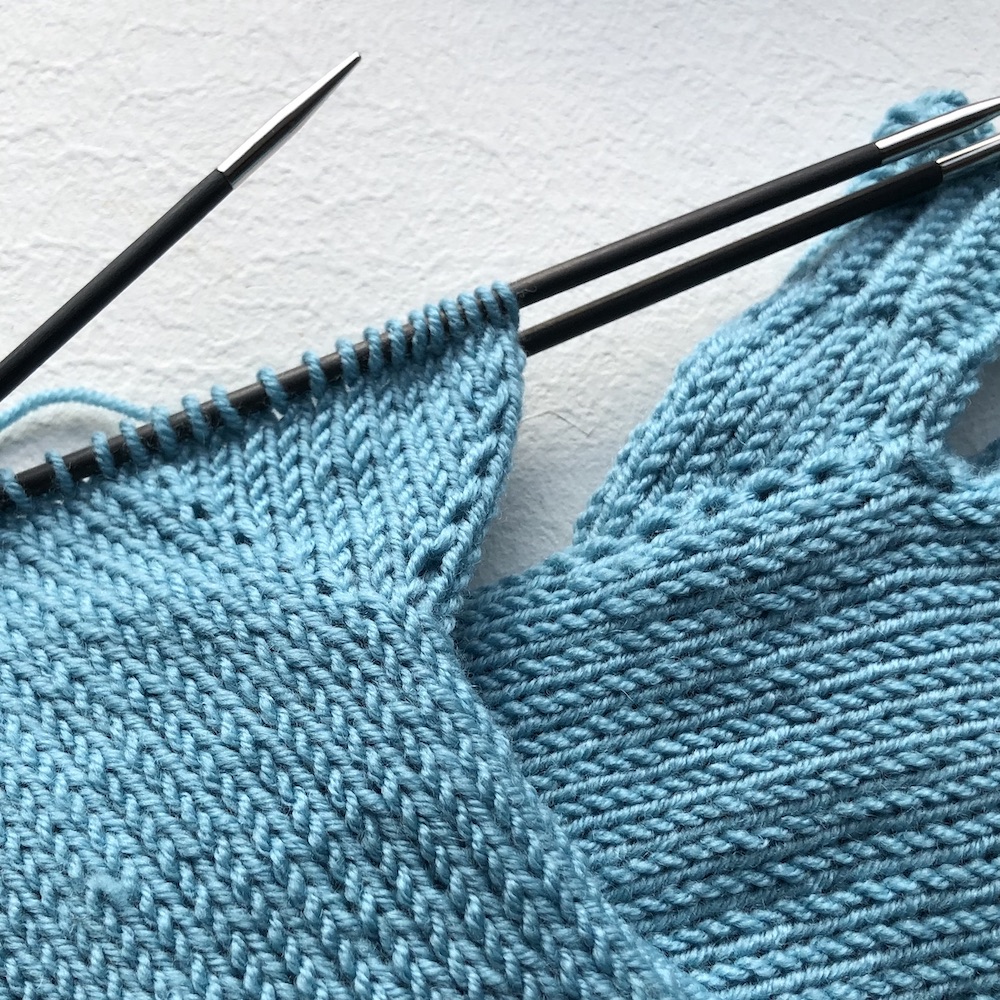
Place 13 (15; 17) gusset stitches from the stitch holder back on the needles (divide between two needles).
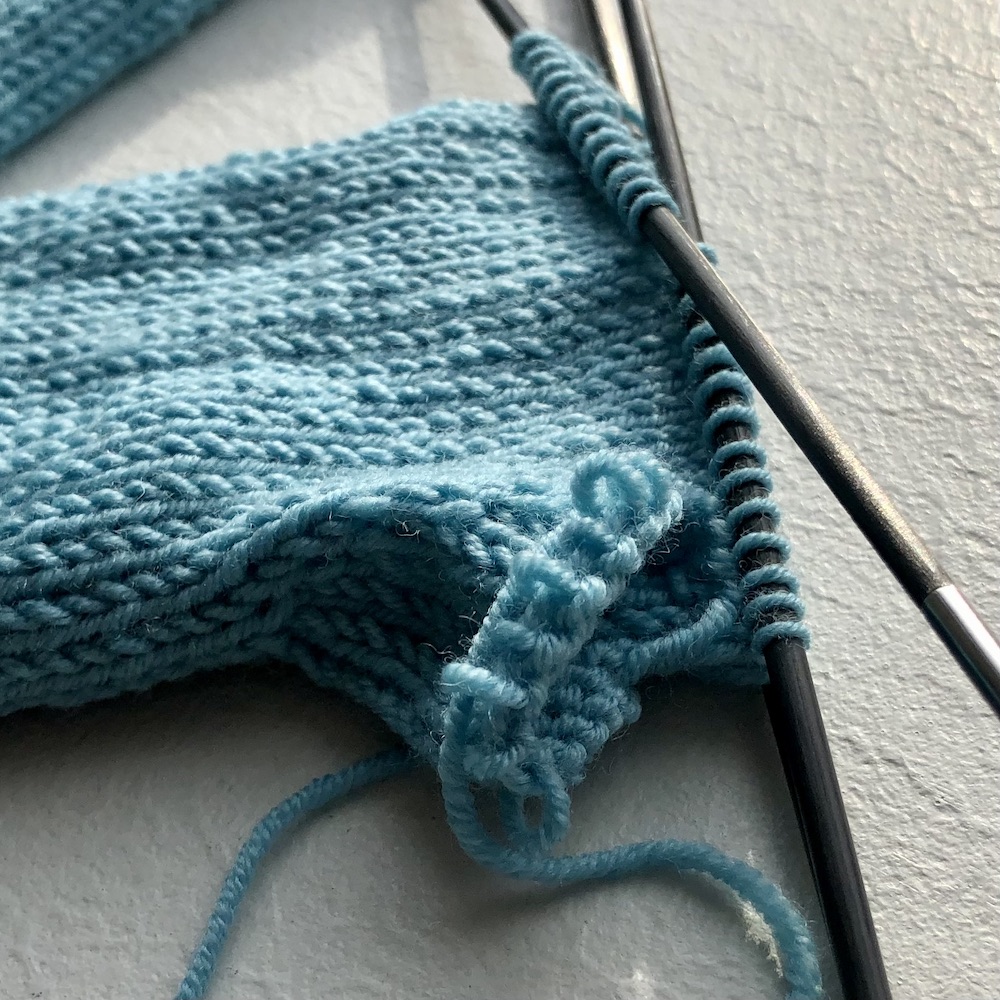
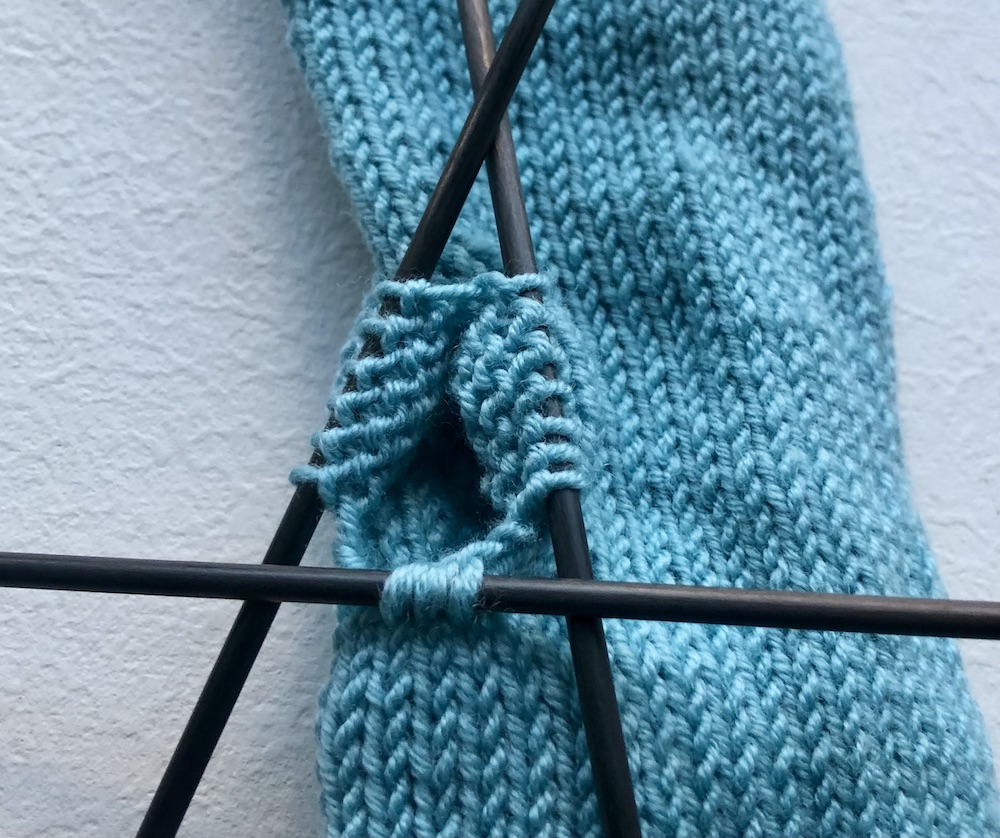
Pick up 3 stitches from the place where you made the thumb hole cast-on stitch (1 stitch before cast-on stitch, cast-on stitch, and 1 stitch after cast-on stitch). Don’t worry if you have a hole in connecting round. You can sew it together in the finishing phase. OR you could pick up more stitches and decrease those on the next round.
- k 12 (16;20) rounds;
- Size S: 10 rounds of (p1, k tbl)
Size M: 14 rounds of (p1, k tbl)
Size L: 16 rounds of (p1, k tbl)
Cast off loosely.
FINISHING
Hide yarn ends and if you have little holes at the beginning of the thumb, sew those too.
I don’t know if I will get a few hours to knit these gloves. But I just wanted to say, that they are the most beautiful gloves I have seen as a knitting pattern. I would love to have the time to knit them.
Thank you for your kind words 🙂
Gosh that’s so complicated that my poor mind can’t even grasp it. If you ever do a video on how to make these gorgeous gloves I will make a pair for me, my girls, my best friend and my sisters-in-law! I love them!
Thank you! I’m planning making a video, but it will take some time 🙂
I have started your gloves. I needed a beautiful project, complicated so I can focus upon and be calm. They will help my wrists and keep me happy, too
I’m so glad! I hope you enjoy this knitting project 🙂
Hi. These are just beautiful! Thank you for sharing your pattern. I have a question though. When knitting the yo, we usually knit them through the back loop to avoid holes. However, in this pattern, we do not want to do that on round 7 so that it does that beautiful edging. But what about in the pattern when it does not say to k tbl? Thank you
Great question! I never thought about that.
Not sure, to be honest. I never knit the yarn over through the back loop because the point of the yarn over (for me) is to get the hole. But that’s my opinion and it’s a matter of preferences. Both ways are correct.
What I would do if I were you is I would try the pattern out both ways to decide what I like the most. There is this technique that I named “1/2 RT” for the lack of a better abbreviation – make sure you just knit the yarn over on this one. That hole should be visible. Other than that, I think it’s a matter of choice 🙂
They are the most beautiful I’ve ever seen. I only wish I had the time to make them.
Thank you 🙂
So excited to see this pattern. Absolutely beautiful! I have to make these for myself for next winter. A good summer project. Thanks so much for this free pattern.
I’m glad you like it! I hope you enjoy knitting these 🙂
Is it possible to make these gloves on circular needles?
I think so, I don’t know. I prefer double-pointed needles.
What means P2? I can knit from graphs and now trying to learn how to read all this letter “coding”. I am still impressed that someone can knit something without seeing the full picture of the final result at the front of one.
Usually, P2 means purl 2 stitches. 🙂
Thank you for the pattern, I just finished a pair with a sparkly yarn, love them.
Thank you for this beautiful pattern!
I just finished glove number 1 and it turned out beautifully! The pattern is very well written and easy to follow. Thank you for sharing! 💖
Good morning! I found this via Pinterest, and are excited to try this pattern. That you took the time to write out the pattern in such detail for the sizes means a lot to this fairly new knitter. I have one boot cuff to finish(a late gift) and then I am going to give these a go. I do have DPNs in the correct size, but also have some new 2″ circulars, which hubby gave me for Christmas, and will try those, too, to find how they will work. I am not a fan of the magic loop for circular projects, as I seem to end up with big ladders, but the traveling loop should work. I want to make several pairs of these for gifts next year, so will try all the methods and see what works best for me. Thank you again for the lovely pattern!
Thank you for the pattern, I just finished a pair with a sparkly yarn, love them. It’s a gift for my sister. All the best, Monika (South Germany)
I’m glad you like them 🙂